Drainfield Installation in Boise: How to Plan a Code-Compliant Septic System That Lasts

Stock photo of a Boise-area rural drainfield installation site with excavated trenches, protected construction zones, construction equipment in the background, and typical Treasure Valley landscape, with no people or faces visible.

What rural homeowners and land buyers should know before they break ground

A drainfield (also called a leach field) is not just “some trenches in the yard.” It is the long-term treatment area that keeps your septic system working safely and protects groundwater. In the Boise area and across the Treasure Valley, soil variability, seasonal moisture, and project timing can make or break a drainfield plan. If you are buying land, building a home, or replacing an aging system, the smartest move is to approach drainfield installation as a site-prep project with clear steps: evaluation, permitting, layout, excavation, inspection coordination, and careful backfill.

Why drainfields fail (and what “good soil” actually means)

Drainfields are designed to disperse septic effluent into soil where it can be filtered and treated. That treatment depends on having the right soil conditions at the right depth. Idaho rules for standard subsurface disposal emphasize suitable soil types and effective soil depth between the absorption area and any limiting layer (like groundwater or restrictive soils). 

Common reasons a drainfield struggles over time:

Site mismatch: Soil drains too fast (risking inadequate treatment) or too slow (leading to surfacing, backup, or saturation).
High groundwater or restrictive layers: Not enough separation between the drainfield and limiting conditions.
Poor construction sequencing: Driving equipment over the drainfield area and compacting soil before installation.
Drainage and grading issues: Stormwater is allowed to run onto the drainfield footprint.
Unknown utilities or conflicts: Trenches get reworked, moved, or compromised during hookups.

A strong plan starts with site evaluation. Southwest District Health (SWDH) notes that an on-site evaluation is required prior to issuance of a subsurface sewage disposal permit. 

Septic vs. sewer in the Treasure Valley: a practical decision framework

If you are purchasing land, one of the first questions is whether sewer is available or whether septic is the realistic option. For properties near city infrastructure, a sewer connection may be possible, but it is still a coordination-heavy excavation job. Boise City code addresses sewer tap-ins and notes that only properly licensed parties are authorized to make the actual tap-in to the Boise City sewer. 

Decision Point Septic + Drainfield Sewer Connection
Upfront feasibility Depends on soil, slope, separation distances, and evaluation results Depends on main availability, distance, easements, and city requirements
Primary “risk” variable Soil performance and long-term protection of the drainfield area Utility conflicts, right-of-way work, and tap-in coordination
Excavation scope Tank excavation, drainfield trenches/bed, pipe runs, backfill, and grading Trenching to main, bedding, backfill, surface restoration, and inspections
Ongoing reality Protect drainfield from compaction, excess water, and misuse Fewer on-lot components, but still subject to line maintenance and access rules
Note: Pricing varies widely by site conditions and scope. In the Boise area, inflation and availability of inspectors, materials, and equipment can influence timelines and budgets. Plan for a contingency and avoid designing at the absolute minimum.

Did you know? Quick facts that prevent expensive mistakes

811 is not optional. Idaho’s damage prevention guidance reinforces that all counties have access to an 811 notification center to request utility locates before excavation. 
Site evaluation drives the permit. SWDH indicates that an on-site evaluation is required before a subsurface sewage disposal permit is issued. 
Utility marks are approximate, not perfect. Treat painted lines and flags as a guide and use safe exposure methods in the tolerance zone, especially near gas and power. 

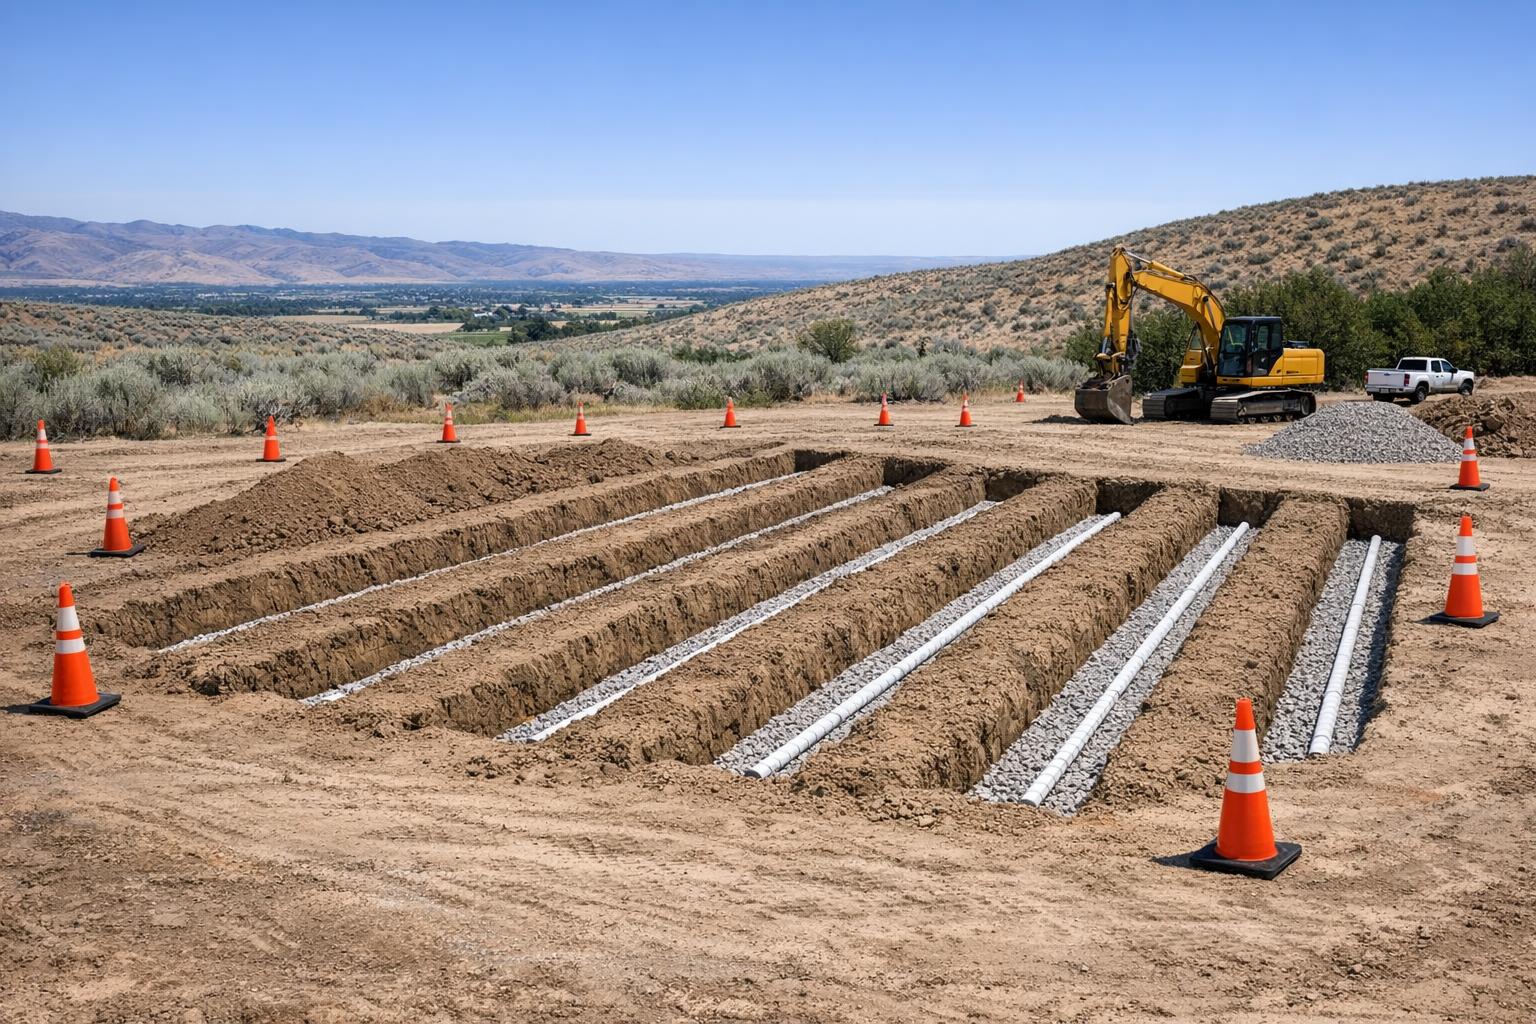
Step-by-step: how drainfield installation typically works in the Boise area

Every property is different, but most successful drainfield projects follow a predictable sequence. This is the workflow C3 Groundworks coordinates on many rural and edge-of-development sites.

1) Confirm feasibility early (before finalizing your build plan)

Start with a site evaluation pathway that matches local requirements. If you are buying land, do not assume “the neighbor has septic” means your parcel will be the same. Small changes in slope, soil layers, or seasonal moisture can change what is allowed and what is durable. SWDH’s septic and land development guidance highlights evaluation and permitting steps as part of getting an onsite system approved. 

2) Protect and reserve the drainfield area

Treat the drainfield footprint as a “no-compaction zone.” That means: no parking, no material staging, and no heavy equipment traffic. Compaction reduces the soil’s ability to accept and treat effluent and can shorten the system’s life. A good site-prep plan creates access routes for construction that do not cross the future drainfield.

3) Call 811 and verify what 811 does not mark

Before any excavation, submit a locate request through 811 and wait until utilities respond. Idaho’s safe digging guidance explains the 811 notification process and response timing expectations. 

Also, plan for a “private locate” strategy when needed. Some privately owned lines (for example, irrigation, private power beyond the meter, or site-installed lines not in member databases) may require additional locating beyond the public 811 ticket. The goal is simple: no surprises when trenching for the septic tank outlet line, distribution piping, or utility crossings. 

4) Excavate to plan, maintain grade control, and keep soils clean

Drainfield performance depends on correct elevations and a consistent slope. During excavation, the priority is controlling grade, protecting the soil interface, and preventing smear or overworking of wet soils. When conditions are saturated, pausing for a day can be smarter than forcing progress and damaging the soil structure.

5) Coordinate inspections and document what was built

Onsite wastewater projects typically involve scheduled checks at key stages. Keep records of layout, depths, and as-builts, especially if you are also planning future utilities, a shop slab, or an RV pad. If you later expand, these records help avoid accidental encroachment into the drainfield area.

6) Final grading: keep stormwater away from the drainfield

Your drainfield is not a detention basin. Final grading should shed surface water away from the drainfield footprint and prevent concentrated runoff from roofs, driveways, and downspouts. This is where site clearing, grading, and drainage planning directly support septic longevity.

Local Boise angle: timing your project around weather, soils, and scheduling

In the Boise area, project timing is not just a convenience issue. Soil testing and excavation conditions can change with the seasons. For example, local contractors often plan evaluations and earthwork to avoid frozen ground constraints and to reduce the risk of working in saturated soils. If you are purchasing land and aiming to build quickly, start the feasibility conversation early, even before your house plans are finalized. 

Also consider how your full site plan interacts: driveway access, building pad elevation, future shop locations, and utility trenching routes. A coordinated lot development approach helps keep the drainfield protected while still moving the rest of the project forward.

Best practice for rural builds
Reserve a drainfield area on your site plan and fence it off before heavy equipment arrives.
Best practice for replacements
Plan access for demolition and excavation without crossing the replacement drainfield footprint.
Best practice for sewer decisions
Verify connection requirements and who is authorized to perform the tap-in before you budget or schedule trenching.

How C3 Groundworks supports drainfield installation projects

C3 Groundworks is a locally owned excavation and site-preparation contractor serving Boise and the Treasure Valley. For septic and drainfield projects, the value is in coordination and execution: site prep, trenching, grade control, utility awareness, and working cleanly and safely so inspections can move forward without rework.

If your project includes related scopes, we can also help align the sequence with:

Utility trenching and hookups
Site clearing and grading
Lot development and build-ready pad preparation
Concrete foundations, slabs, driveways, and RV pads (planned to avoid drainfield conflicts)

Ready to confirm septic feasibility or schedule drainfield excavation?

If you are building on rural land or replacing an aging system, a clear plan protects your timeline and your property. Tell us where your site is in the process (land purchase, evaluation, permit stage, or ready to dig) and we will help you map the next steps.

Request a site-prep consult

Prefer to see past work first? View our project gallery.

FAQ: Drainfield installation near Boise

How do I know if my land can support a conventional drainfield?
It comes down to site evaluation results: soil characteristics, effective soil depth, and any limiting layers. Idaho’s subsurface disposal rules reference suitable soils and effective soil depth as part of standard system design. (law.cornell.edu)
Do I really need to call 811 if my property is “out in the country”?
Yes. Utility lines can exist in unexpected places, including laterals, rural feeds, and older installations. Idaho’s safe digging guidance explains the statewide 811 notification process used to request locates before excavation. (dopl.idaho.gov)
Can I put a driveway, RV pad, or shop over a drainfield?
Typically, you should avoid building or paving over the drainfield area. Added load and compaction can reduce soil performance and limit future access for maintenance. If you are planning concrete work, it is best to coordinate the full site layout early so drainage and traffic patterns do not compromise the drainfield.
If sewer is nearby, can any contractor connect me to it?
For Boise City sewer tap-ins, the city code specifies that only appropriately licensed parties are authorized to make the actual tap-in. Even when trenching is straightforward, the tap-in portion must be handled correctly and inspected. (codelibrary.amlegal.com)
What is the biggest thing I can do to extend drainfield life?
Protect the drainfield footprint: keep heavy equipment off it, keep roof and driveway runoff away, and avoid altering grades after installation. Many drainfield problems start as surface drainage problems or construction compaction problems, not “bad luck.”
For additional general questions, you can also view our site FAQ page: FAQS.

Glossary: key septic and excavation terms

Drainfield (Leach Field)
Soil absorption area where treated effluent is dispersed through piping and infiltrates into the soil for final treatment.
Perc Test (Percolation Test)
A soil test is used to understand how quickly water moves through soil, helping determine septic feasibility and sizing.
Effective Soil Depth
The usable depth of suitable soil between the drainfield absorption surface and limiting layers like groundwater or restrictive soils. Idaho rules reference effective soil depth in standard system considerations. 
811 Locate (One-Call)
A free notification service that alerts utility owners to mark underground facilities before digging. Idaho provides statewide access through an 811 notification center. 
Tolerance Zone
The buffer area around a marked utility where extra caution is required, often involving careful exposure methods to confirm the exact location.
Learn more about C3 Groundworks: About or explore all offerings on Our Services.

Accessibility Toolbar

Scroll to Top