Build faster—and safer—by getting trenching right the first time
Utility trenching looks straightforward until it isn’t. In the Treasure Valley, you’re balancing soil variability, traffic and access constraints, Idaho’s 811 locate rules, and safety requirements that protect workers and property. When trench safety is planned early, plumbers and electricians can stay on schedule, homeowners avoid surprise rework, and the whole project runs smoother.
Below is a field-tested, Boise-focused guide to planning trenching for water, sewer, power, gas, communications, and irrigation—without stepping into the common mistakes that trigger delays and safety risks.
Important note: trenching rules can change based on whether you’re working on private property, within a public right-of-way, or tying into a municipal system. This guide is educational, not a substitute for your project’s permit conditions or engineered plans.
When you need a local excavation and site-prep contractor who can coordinate trenching, backfill, compaction, and site restoration, C3 Groundworks supports residential and commercial projects across the Boise area.
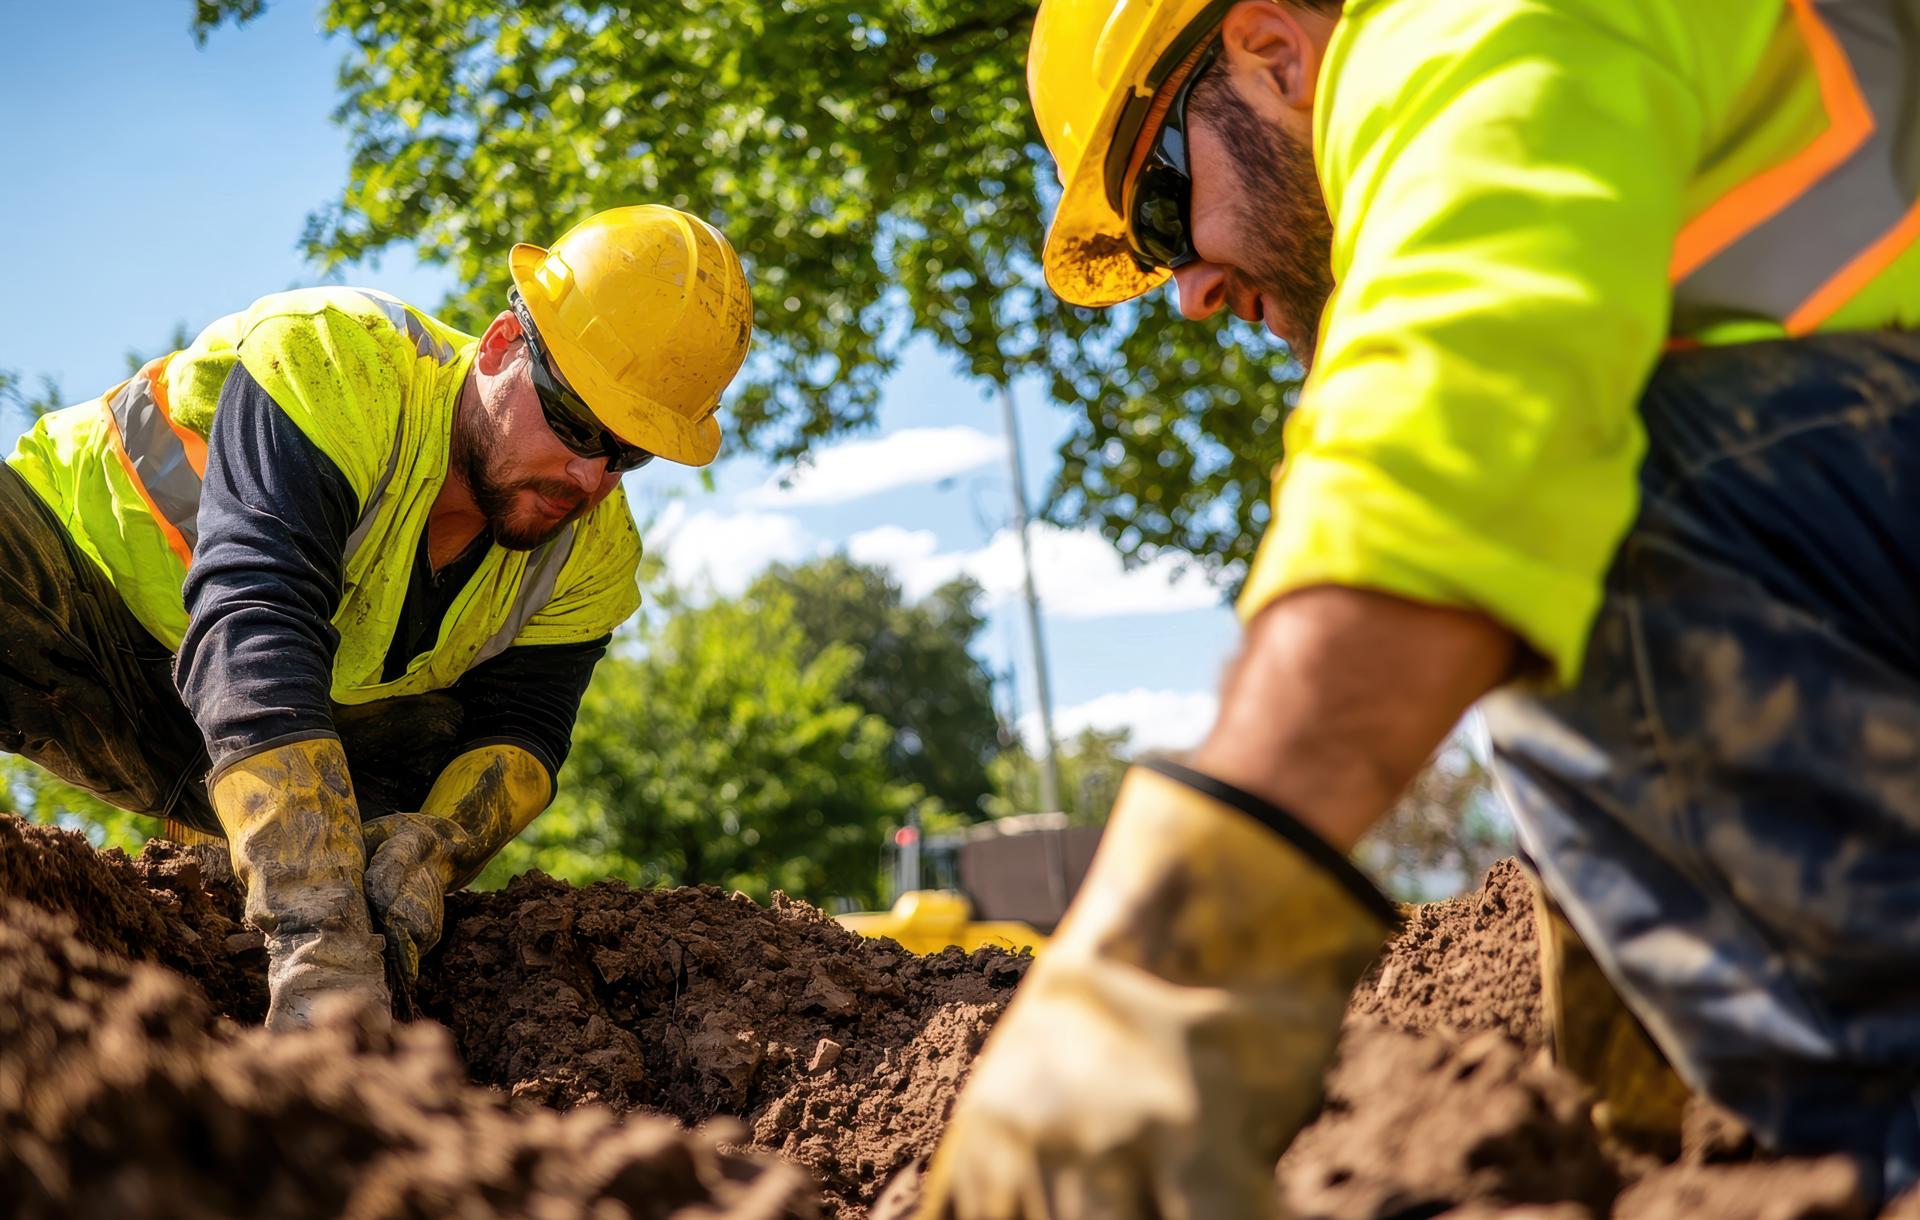
What “trench safety” actually means (beyond the buzzwords)
Trench safety is a system: locating utilities, planning a safe trench geometry, controlling water, keeping heavy loads away from the edge, providing safe access/egress, and inspecting conditions as they change. OSHA’s excavation standard requires workers be protected from cave-ins using protective systems in most excavations 5 feet and deeper, with limited exceptions (for example, stable rock, or shallow excavations under 5 feet where a competent person finds no cave-in hazard).
The key phrase is “competent person”: someone capable of identifying hazards and authorized to fix them immediately. On real job sites, that means trench conditions are evaluated and re-evaluated—especially after weather changes, water intrusion, or vibration from equipment/traffic.
Boise-specific context: utilities, permits, and cold-weather realities
1) Idaho 811 is not optional—plan it into your schedule
Idaho’s damage-prevention rules require excavators to contact the one-number notification service at least 2 business days and no more than 10 business days before excavation, and to verify utilities have responded before digging. Marking your proposed route in white paint is also part of standard best practice and is referenced in state guidance. Build that time into your job schedule so trenching doesn’t become the bottleneck.
2) Right-of-way work is a different category than backyard trenching
If your trench crosses or occupies a public right-of-way (sidewalks, streets, alleys, public easements), you may need specific permits and inspection coordination. Don’t assume a private-property approach applies to ROW work—traffic control, restoration standards, and inspection timing can drive the schedule.
3) Freeze-thaw affects trench depth planning and surface restoration
Boise-area frost depth is often discussed in the ~24–36 inch range depending on exposure and microclimate, but exact requirements can vary by jurisdiction and application. For water services and lines that must be protected from freezing, confirm the local standard for your specific site and utility provider before finalizing depth.
Step-by-step: safer trenching for utilities in the Treasure Valley
Step 1: Pre-plan the route (before anyone books an inspection)
Start with a sketch that includes: start/end points, connection locations, known obstacles (existing concrete, trees, sprinklers, fences), and where spoils can be staged. For homeowners adding a shop or ADU, identify where multiple lines might share a corridor (power + communications, or water + irrigation) so the trench can be sized and sequenced properly.
If you’re coordinating trades, schedule the trench so conduit/sleeves and bedding needs are understood before the excavator mobilizes. A half-day coordination call can prevent a full day of rework.
Step 2: Call 811 early and verify responses
Place the locate request within the legal window (not too late, not too early). Then confirm every utility listed on the ticket has responded before digging. If something is missing, don’t “guess”—request a second notice or follow the correct escalation path.
Also: 811 marks are a starting point, not a guarantee. Hand-exposure (potholing) at crossings is a common best practice when the stakes are high.
Step 3: Choose the right protective approach for the depth and soil
Protective systems can include sloping/benching, shoring, or trench shielding. The “right” choice depends on depth, soil classification, nearby loads (equipment, spoil piles, structures), and site constraints like tight side yards or existing foundations.
Even shallow trenches can become hazardous when conditions change: water seepage, granular soils, vibration, or surcharge loads near the edge.
Step 4: Control spoil placement, traffic, and edge loading
One of the fastest ways to create a cave-in risk is stacking spoils or parking equipment too close to the trench. Plan a spoil zone, keep pathways clear, and treat the trench edge like a fall hazard—especially when crews are stepping in/out to set pipe bedding or conduit.
If you’re working near a driveway or street, consider vibration and live loads. What’s stable at 8 a.m. can change by 2 p.m.
Step 5: Provide safe access/egress—and keep it close
Workers need a safe way to enter/exit a trench. Ladders and access points should be placed so crews don’t have to travel far inside the trench to get out. That’s not just compliance-minded—it’s practical when you’re moving quickly during pipe set, inspections, or adjustments.
If multiple trades are sharing the trench window, assign a single point of coordination so ladders, barricades, and edge protection don’t “wander” during the day.
Step 6: Backfill and compaction—protect what you just installed
A trench isn’t “done” when the line is in the ground. Improper backfill can lead to settlement, driveway dips, trip hazards, or stressed utility lines—sometimes weeks or months later.
Good trench restoration usually includes: correct bedding material where required, careful lifts, consistent compaction, and surface restoration that accounts for Boise’s freeze-thaw cycles.
Did you know?
Quick comparison table: common trenching scenarios around Boise
| Scenario | Common risk points | What keeps it moving |
|---|---|---|
| Homeowner trench for power + comms to a shop | Missed locates, unclear conduit requirements, tight access along fences | Early trade coordination + verified 811 responses + potholing at crossings |
| Sewer/water service work near an existing driveway | Edge loading, settlement after backfill, restoration timing | Planned spoil zone + lift-by-lift compaction + weather-aware restoration |
| Trenching that touches public right-of-way | Permit/inspection delays, traffic control, strict restoration standards | Permit plan up front + inspection scheduling + compliant barricades/signage |
| Winter/shoulder-season trenching | Water in excavation, frozen spoils, freeze-thaw settlement later | Dewatering plan + correct backfill material selection + tight compaction control |
Local angle: planning trench safety in Boise neighborhoods and the Treasure Valley
Boise-area trenching often happens in tight residential corridors—between homes and fences, near mature trees, or alongside existing concrete flatwork. Those constraints influence whether sloping is feasible, where spoils can be placed, and how equipment can safely access the cut.
If your project includes a new slab, driveway widening, or an RV pad, it’s usually smart to sequence trenching and underground rough-ins before final concrete placement. That approach reduces demolition/replacement risk and keeps restoration clean.
If you’re coordinating a larger build (shop, ADU, or lot improvement), consider bundling excavation tasks—utility trenching, pad prep, and grading—so mobilization and scheduling stay efficient. In the Boise market, that kind of planning often protects budgets from “small” delays that add up quickly.